Document Audit Reports Coming Soon
September 4, 2026
An exciting new feature is on the way for districts on the PRO edition of SameGoal: Document Audit Reports!
These new, admin-only reports will be able to pull information from document history for multiple documents at once in order to review document edits, views, permission changes, and lifecycle events on a large scale. There will be three separate reports, allowing you to audit document information on a per-document, per-student, or per-user level.
Steps
To run the Document History Audit report:- Navigate to Reports > System > Document History Audit.
- Enter in one or more Document IDs. In order to find a document ID you can either:
- Open the document in SameGoal and copy the 19 digit number that follows docID= in the URL.
- Copy the number in the Document ID column if you’ve run one of the other Document Audit reports.
- Select which event types to include in the report.
- Optionally, provide a date range.*
- If you enter a start and an end date, only events that took place on or between those dates will be included.
- If you only enter a start date, only events that took place on or after that date will be included.
- If you only enter an end date, only events that took place on or before that date will be included.
- Run the report.
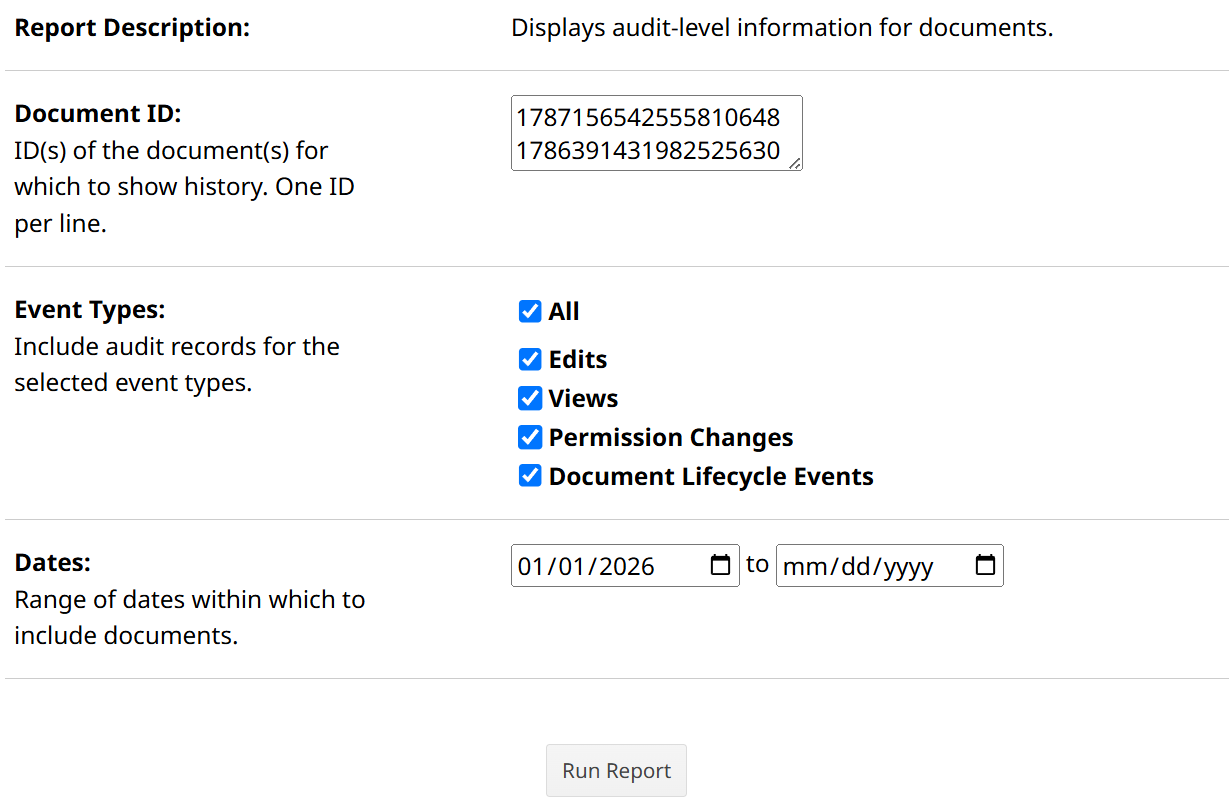
This report will return information from the specified document(s). In order to change which document(s) to pull from, you can either exit the report and rerun it, or change the report parameters from within the report results by clicking the edit button in the toolbar.
Steps
To run the Student Document Audit report:- Navigate to Reports > System > Student Document Audit.
- Search for a student either by name or by student ID.
- Select which event types to include in the report.
- Optionally, provide a date range.*
- If you enter a start and an end date, only events that took place on or between those dates will be included.
- If you only enter a start date, only events that took place on or after that date will be included.
- If you only enter an end date, only events that took place on or before that date will be included.
- Run the report.
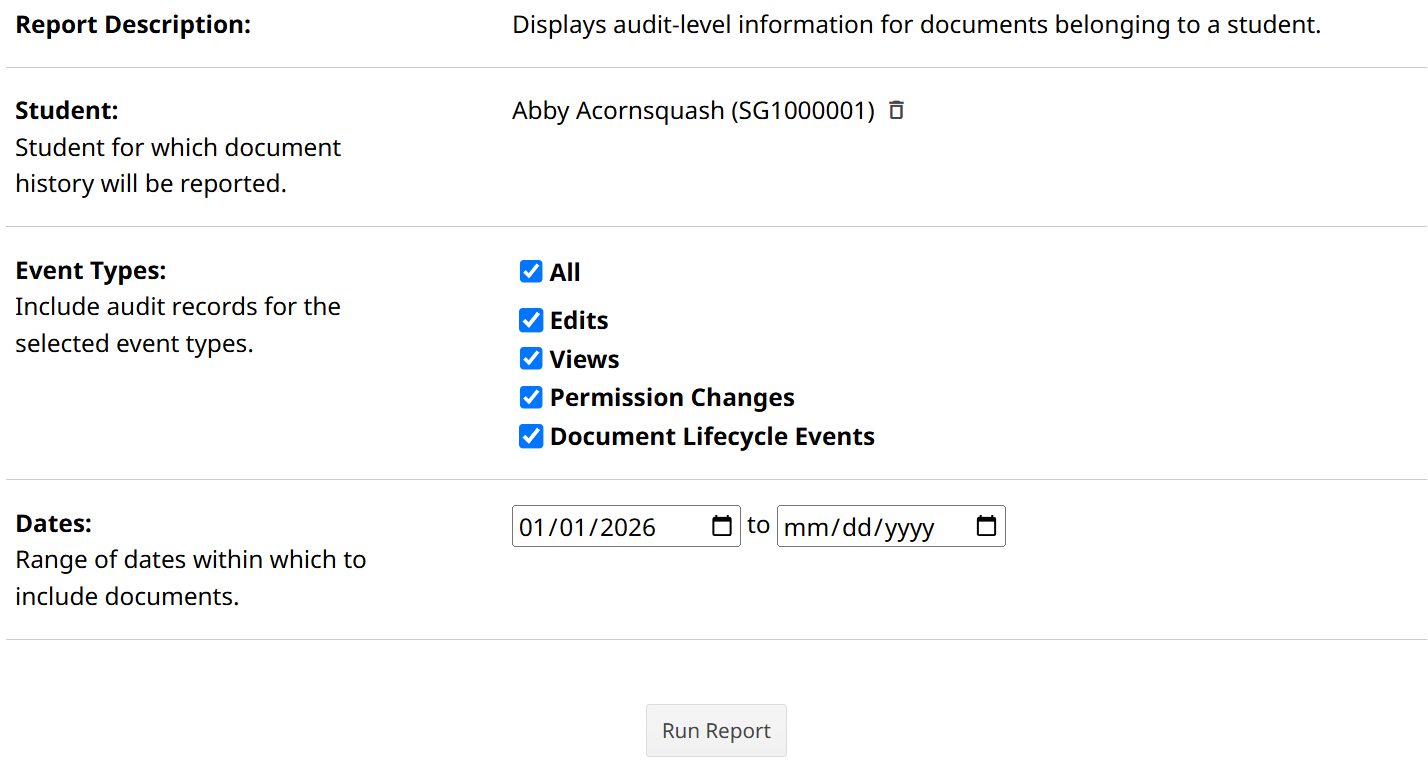
This report will return information from the specified student’s documents. In order to change which student’s documents the report is pulling from, you will need to exit the report and rerun it.
Steps
To run the Student Document Audit report:- Navigate to Reports > System > Staff Document Audit.
- Search for a user either by name or email/username.
- Select which event types to include in the report.
- Optionally, provide a date range.*
- If you enter a start and an end date, only events that took place on or between those dates will be included.
- If you only enter a start date, only events that took place on or after that date will be included.
- If you only enter an end date, only events that took place on or before that date will be included.
- Run the report.
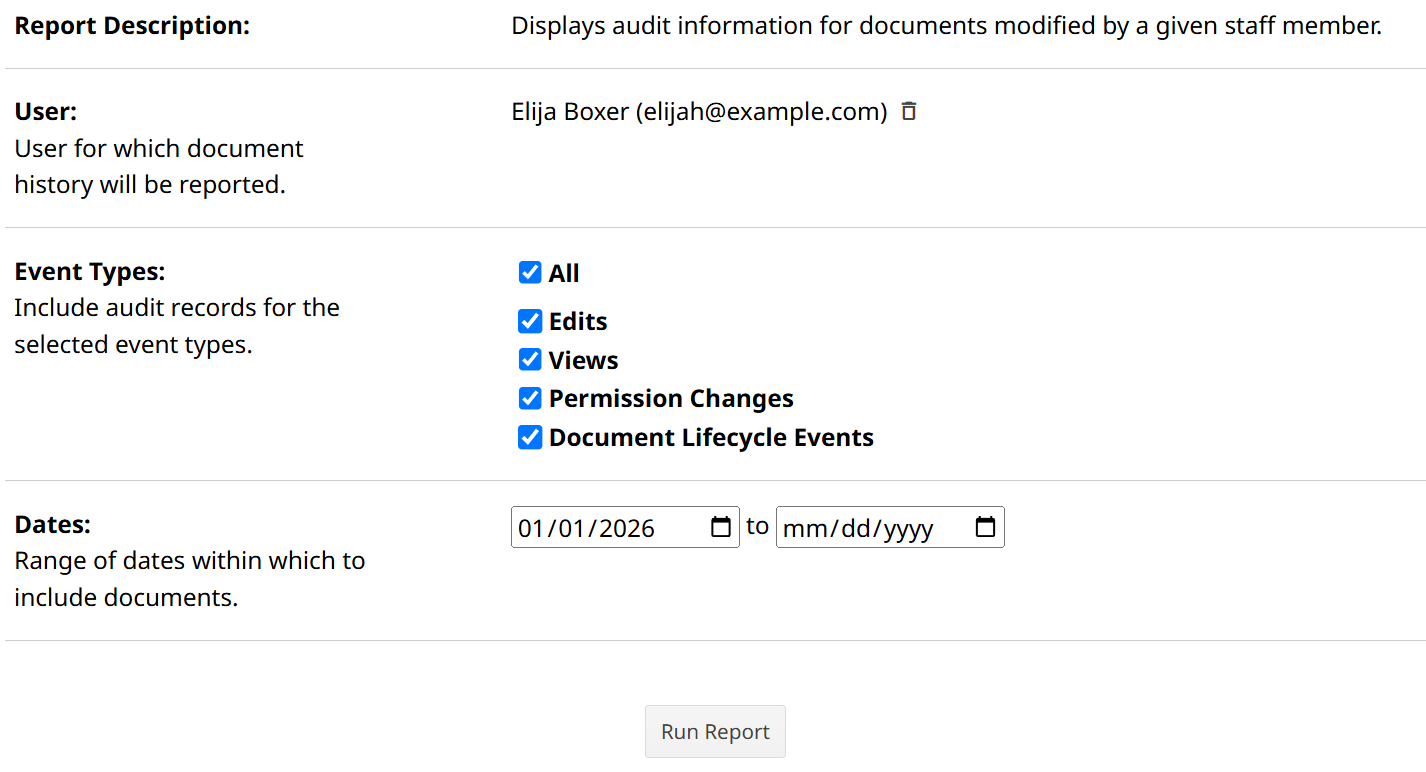
This report will return information about each time the specified user has interacted with a document, including each time a different user shared a document with them. In order to change which user the report is returning information for, you will need to exit the report and rerun it.
When the Document Audit reports are run, there will be one row for each event, and each event will be associated with a specific document and user.
Just like in document history, each event will include details about what action was taken, which user is responsible, and when the event took place. Because this report can pull from multiple documents, the report will also provide details about the specific document and student the event is associated with.
The following columns can be found in each of the Document Audit reports:
- Student ID: The student ID of the student the affected document is associated with. This will be the same in every row of the Student Document Audit report.
- Student Name: The name of the student the affected document is associated with. This will be the same in every row of the Student Document Audit report.
- User Type: Whether the user who is responsible is an admin or standard (non-admin) user.
- User Name: The name of the user who is responsible.
- User Email: The email of the user who is responsible.
- Form Name: The form name of the affected document.
- Document ID: The document ID of the affected document.
- Event Type: Whether the event was an edit, view, permission change, or document lifecycle event. If it was a document lifecycle event, it will specify what kind of lifecycle event (document created, document completed, formal amendment created, etc.).
- Date: The date the event took place.
- Time: The time the event took place, in the district’s time zone.
- Field Identifier: The unique field ID of the affected field. This is only populated for Edit events.
- Description: A brief description of the event. For document edits, it will display the name of the field. For permission changes, it will specify which level of access the user previously had and which level of access was granted. For each document creation event, it will indicate if it was created by copying from an existing document or from District-to-District transfer.
- Value: More specific details about the event, if available. For document edits, this will show the new value of the field. For permission changes, it will list the user (or parent/guardian) the document was shared with. If a document was completed by bypassing validation errors, it will indicate the reason for marking the document complete without resolving validation errors.
lightbulb Tip
Document Audit reports do not currently return information about translations or acknowledgements of receipt. However, this information is still visible in
document history and acknowledgement information can be viewed in a report by going to
Reports >
System >
Acknowledgements of Receipt.
* Document Audit reports have the potential to return a large amount of information. It’s recommended to include a date range if possible in order to limit how many rows the report returns.